
2 CHEAP AND EASY DOLLAR TREE SPRING DECOR IDEAS THAT LOOK AMAZING THAT YOU NEED TO TRY IN 2025
- Cass
- Feb 12
- 2 min read
Updated: Feb 28

I'm crafting some adorable spring and Easter decorations using only items from the dollar store. I'm putting together a colored moss decor bowl and a bunny decorative accent tray. I'm really pleased with how these spring home decor pieces came out. Each piece is proof that you can have stunning and festive decor without spending a lot. Check out how I made each piece below!
This post may contain affiliate links
DIY Colored Moss Bowl
Materials:
Plastic Heart Bowl
Moss
White Chalk Paint
Paint Brush
Spray Paint

Step 1: Gather a large plastic heart bowl, white chalk paint, a paint brush and gold metallic spray paint.

Step 2: Paint the inside and outside of the bowl using white chalk paint. Allow the paint to dry.

Step 3: Coat the entire bowl in gold metallic spray paint.

Step 4: Use different colors to spray paint sections and separate chunks of green moss.

Step 5: Trim foam to serve as a filler to fit inside the bowl.
Step 6: Adhere the moss to the foam.

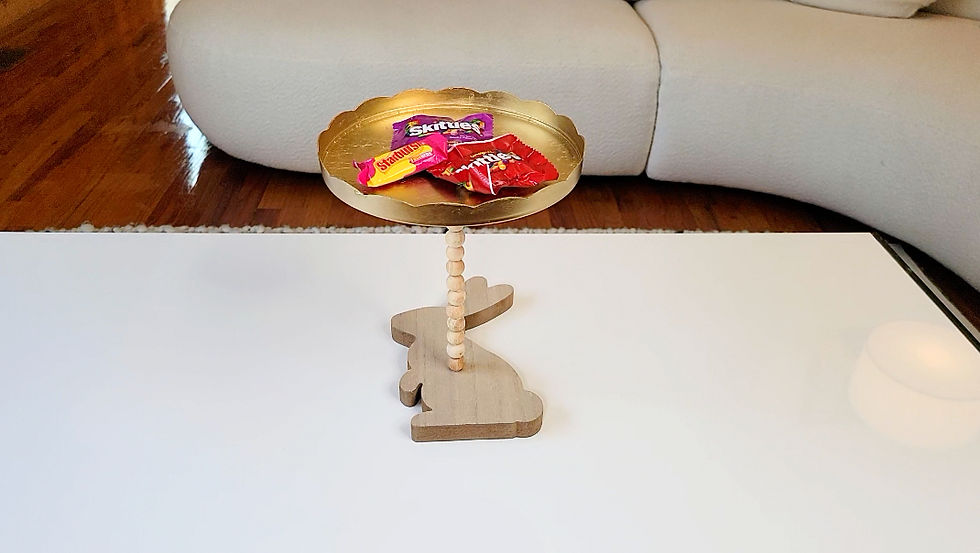
Bunny Accent Decor Tray
Materials:
Faux Wood Bunny
Wood Beads
Scalloped Lid
Wood Skewer
Hot Glue Gun
White Chalk Paint

Step 1: Round up a faux wood bunny, wood beads, scalloped lid and wood skewer.

Step 2: Apply white chalk paint as a primer to all surfaces of the scalloped lid.


Step 3: Spray paint the scalloped lid that has been primed.

Step 4: String a wood bead onto a skewer and adhere it to the center of the bunny.
Step 5: Attach and adhere beads to the top of the skewer.

Step 6: Attach a wood round beneath the lid for extra support. Next, secure the scalloped lid above the beads.
Step 7: Add candy or other filler and get ready to display...

Which one is your favorite? How would you style these in your space? Comment and come say hi. Tag me @Craftingwithcass on Instagram if you decide to create your own! Subscribe to the blog for everything DIY and NEW updates!
Explore additional chic DIY and other posts here on the blog:
Comentários