
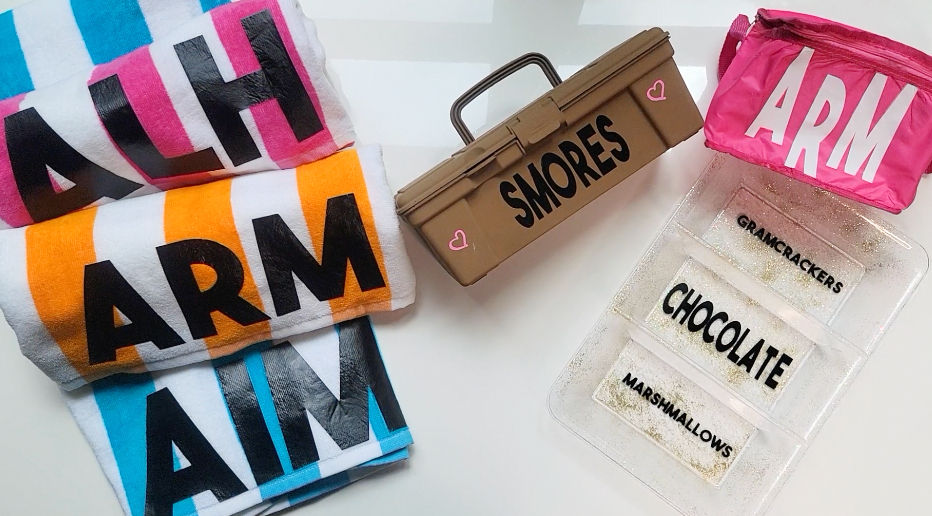
It’s summer time! This is my favorite part of the year. I’m crafting some too cute decor that’s bright and fun and fits the summer vibe. I'm making some affordable monogrammed striped beach towels that pair perfectly with a monogrammed lunch bag tote. I am also using dollar store materials to create a trendy smore's box that I have been seeing at stores. I really love the look of these! Get into the details below!
This post may contain affiliate links
Striped Monogram Beach Towels
Materials:
Beach Towels (Similar Towels to the ones I purchased)
Black Iron On Vinyl
Iron or Press Machine

Step 1: Purchase a few simple beach towels from the store.

Step 2: Remove the packaging from the towels.

Step 3: Determine the size of the space where you intend to position the monogram letters.

Step 4: Choose your font and size your letters in Cricut Design Space

Step 5: Use the Cricut to cut the letters and weed out the vinyl.

Step 6: Place the letters on the towel and iron on both sides of the towel until secured.

Monogram Lunch Box
Materials:
Basic Lunch Box
Iron-On Vinyl

Step 1: Gather what you'll need.

Step 2: Use Cricut Design Space to create and adjust the monogram font and size.

Step 3: Finalize the design and "make it". Position the font on the mat and cut it using the Cricut.

Step 4: Iron-on the image to the front of the lunch box.


Labeled Smores Tray
Materials:
Clear Compartment Tray
Permanent Vinyl
Glitter
Mod Podge

Step 1: Grab a clear sectioned tray from the dollar store.

Step 2: Create text for the labeled sections of the tray.


Step 3: Cut out and weed the excess vinyl from the words.

Step 4: Use transfer tape to adhere the words to each section of the tray.

Step 5: Flip the tray over to bottom. Coat the bottom with Mod Podge and glitter.

Smore's Box
Materials:
Toolbox
Brown Chalk Paint
Paint Markers
Paint Brush
Vinyl Text

Step 1: Collect what you will need.

Step 2: Paint the entire outside of the toolbox using brown chalk paint.

Step 3: Stick on labeled vinyl text on the front of the box.

Step 4: Use paint markers to doodle and add other text on the box.
Step 5: Load the box with all the goodies to make the best smores.

Do you love these as much as me? I love how the beach towels turned out! Comment and come say hi. Tag me @Craftingwithcass on Instagram if you decide to create your own! Subscribe to the blog for everything DIY and NEW updates!
Watch the full video for more details! Watch short DIYs on Facebook!
Comentarios